
Thanks to all of you for the overwhelming response on my last makeup look. Many of you even asked to do a post on how I created the ‘Ombre Lips’. Sometimes it feels boring to apply the lipstick in regular style so digressing from the usual norms can be excited and fun too. Today, I am showing you how to create Ombre Lips in the easiest possible way.
As I have said in my last post ‘Ombre’ means fading and in the ombre lip look you take more than 2 lips shades and create an illusion that they fade into each other. Usually, the dark lip shade is around the edges and corner of the lips and the light shades are at the centre. You can also take lip glosses and lip liner to make the look even more beautiful and attractive. Now, let’s go step by step and see how you can create this look:
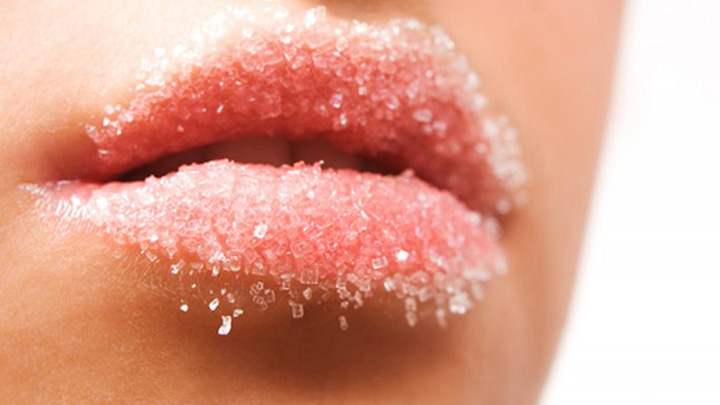
Step 1: Exfoliate & Moisturize: Exfoliation should always be a regular part of lip care. It helps in getting rid of dead skin cells and keeps the lips smooth. Also, if you exfoliate the lips on regular basis the blood supply will increase and there will be fewer chances that you will ever have to go see chapped lips. Now, to create Ombre lips exfoliation becomes even important. In this lip look, finish is of extreme importance so if your lips are not exfoliated you will see the accumulation of dead skin when you will blend the lipstick together, which further will spoil the finish. So start with exfoliation and then moisturize the lips.
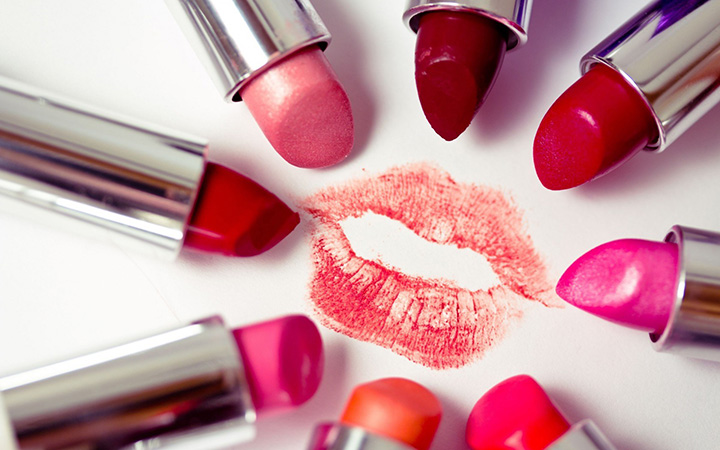
Step 2: Choose the right shades: To get the Ombre lips right shade selection is very important. Basically, you have to choose monochromatic shades, which mean the shades should belong to the same color family and there should not be a drastic variation with them. For example, you can go with shades such as red & brown, purple & pink, red & orange etc. Going with extreme end shades like brown & pink, etc is not considered a good choice for ombre lips but again, there are no set protocols. You can experiment as much as you want. If you are going with two lips colors, then one shade serve as your main lip color and the other will be used to fill up the spaces. The best look is achieved when you have darker color at the boundaries and the lighter one at the center. To add more glamour to the look you can apply some gloss at the center of the lips or even some glitter. Applying a shimmer to the lips will give a softly highlighted look and make the pout prominent.
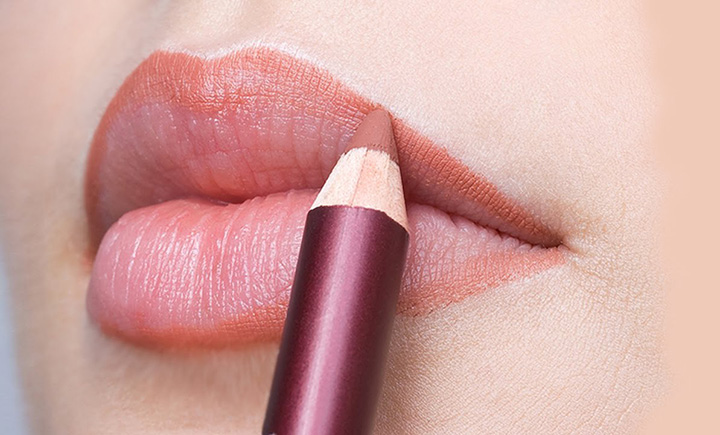
Step 3: Fill it up: Now, once you have selected the shades you need to decide which type of gradient you would want to create. Do you want to go for just darker corners or darker corner + outlining or one lip in a darker shade than the other, etc? There is so many ombre looks out there. You can just pick any and start filling up your lips. Practice is the key here. Make sure that while you are outlining the lips the lipstick stays on and within the boundaries. If it gets out you won’t get the desired results. But wait, there is a fix to it. If you are not happy with the outlining then take some foundation or concealer on a thin makeup brush and clean up the mess. Set the cleaned area using few strokes of a compact powder.
Step 4: Blend it like a pro: As you have filled the lips, it is time to blend the shades flawlessly. To do this work you can either use a soft lip brush or your fingertips. If the lipsticks are of creamy texture you just have to gently rub your lips together and tada… the job will be done at a snap of the fingers. Use the tissue paper technique for long lasting lipstick.
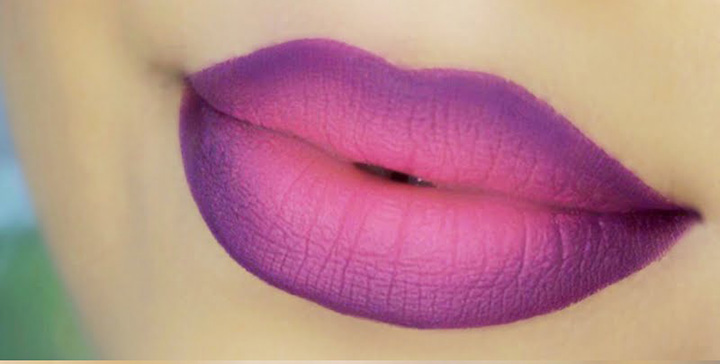
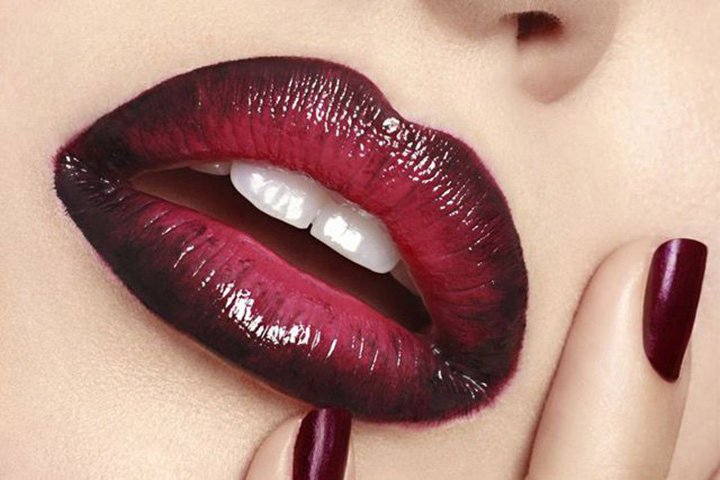
Personally, I like creating ombre look using matte lipstick. Reason being, the finish looks more professional and immaculate. You can go for any satiny, creamy or any other formula that you think you will be able to carry with aplomb.
Image source: google
You might also like reading these related topics:
Makeup Look- Ombre Lips With Copper Eyes
Makeup Basics-How To Apply Concealer Properly
Makeup Basics-How To Choose Right Foundation
Makeup Basics-How To Choose Right Concealer
What Is The Difference Between Primer, Foundation and Concealer?
Quick Tips – How To Prevent Kajal From Smudging
How to apply liquid eyeliner on top eye lid – Makeup Tutorial

Recent Comments